
Removing a tree stump can be one of the toughest parts of yard cleanup. Digging it out is exhausting, and renting heavy equipment isn’t always practical.
One effective alternative is the controlled burn method, which gradually burns the stump from the inside out — breaking it down naturally and efficiently.
When done correctly, this method can save time, reduce effort, and eliminate deep roots.
🌳 Why This Method Works
Tree stumps are dense and retain moisture, which makes them difficult to burn on the surface.
By drilling holes and creating airflow, you:
- Allow oxygen to circulate inside the stump
- Help fire penetrate deep into the core
- Dry out the wood internally
- Encourage a slow, controlled burn instead of surface charring
Adding fuel materials helps maintain heat long enough to burn below ground level.

🛠️ Tools & Materials Needed
- Power drill with long wood drill bit (10–20 mm)
- Sawdust, dry wood chips, or small sticks
- Vegetable oil or used cooking oil
- Fire starter (natural fire starter or safe ignition source)
- Matches or lighter
- Shovel
- Water source (hose or bucket for safety)
- Protective gloves
⚠️ Important Safety First
Before starting:
- Check local regulations — burning may be restricted
- Choose a calm day (no wind)
- Keep water nearby at all times
- Clear dry grass, leaves, and debris around the stump
- Never leave the fire unattended
🔧 Step-by-Step Process
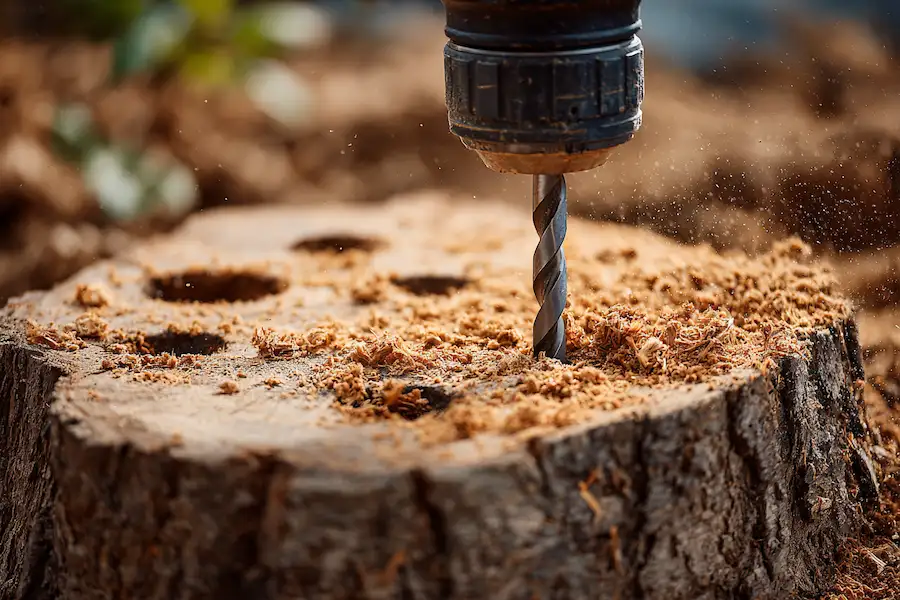
Step 1: Drill Vertical Holes (Top of the Stump)
Drill multiple deep holes straight down into the stump:
- Space them evenly across the surface
- Go as deep as possible (15–30 cm or more)
👉 These holes act as fuel chambers and allow heat to reach the inner core.
Step 2: Create a Central Core Hole
In the middle of the stump:
- Drill one larger, deeper hole
👉 This becomes the main burn chamber, where heat will concentrate.
Step 3: Drill a Side Airflow Hole
From the side of the stump:
- Drill a horizontal hole that connects to the central hole
👉 This is a crucial step — it allows:
- Oxygen flow into the fire
- Better combustion
- Continuous burning inside the stump
Without airflow, the fire will suffocate.
Step 4: Fill the Holes with Fuel Material
Add into the vertical and central holes:
- Sawdust
- Dry wood chips
- Small twigs
👉 These materials:
- Ignite easily
- Transfer heat deeper into the stump
- Help sustain burning from inside
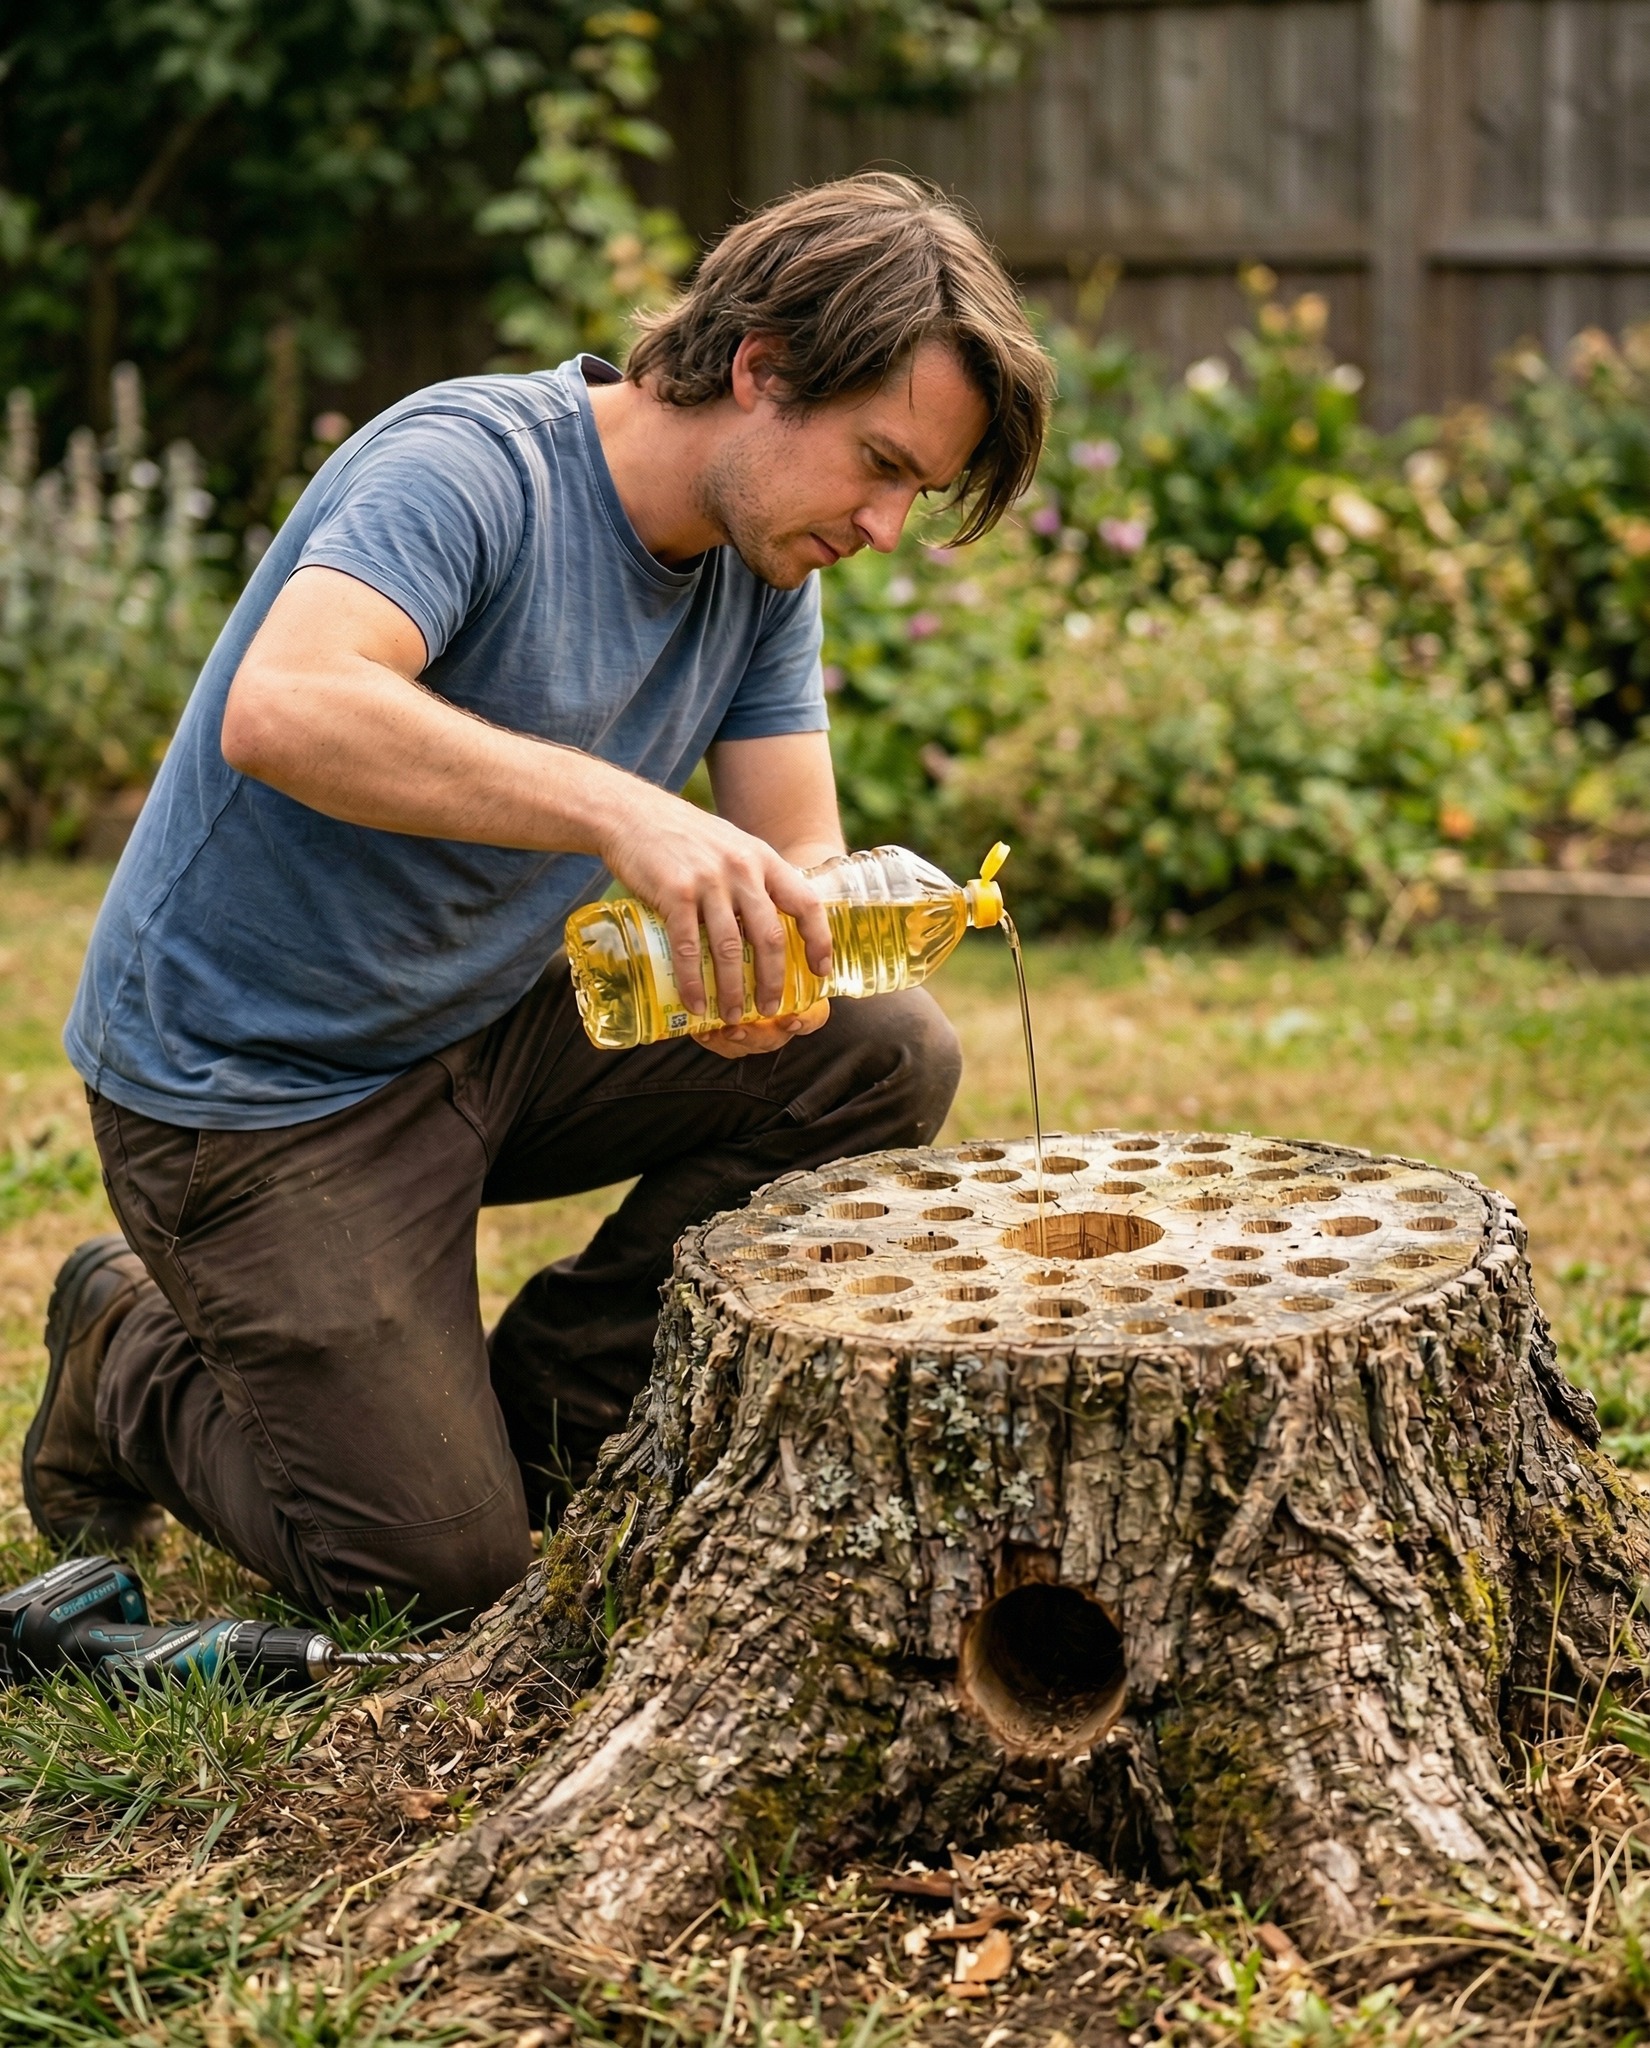
Step 5: Add Oil for Sustained Burning
Pour vegetable oil over:
- The top surface of the stump
- Inside all drilled holes
👉 Oil helps by:
- Soaking into the wood fibers
- Making the stump more flammable
- Extending burn time
- Maintaining steady heat instead of quick flames
💡 Tip: Let the oil soak in for several hours or overnight for best results.
Step 6: Ignite the Stump
Place a fire starter into the central hole and ignite it carefully.
- Start with a small flame
- Let the fire build gradually
👉 Avoid pouring liquid accelerants directly onto an active flame.
Step 7: Feed the Fire Gradually
As the stump begins to burn:
- Add small pieces of wood on top
- Maintain a steady burn
👉 This helps:
- Increase temperature
- Burn deeper layers
- Reach underground roots
The goal is a slow, consistent burn, not a large uncontrolled fire.
Step 8: Let It Burn Down Completely
Continued on next page:
