
Gardening is a deeply rewarding hobby that connects us with nature, allowing us to cultivate beauty and sustenance right in our backyards. However, maintaining the tools that make this possible can sometimes feel like a chore. Metal gardening shears, in particular, are prone to rusting, which can make them less effective and even damage the plants you’re trying to nurture.
As someone who cherishes their garden, I was dismayed to find my trusty shears covered in a stubborn layer of rust. I had tried scrubbing, soaking, and even purchasing expensive rust removers, but nothing seemed to work without requiring a significant amount of effort. That was until my best friend introduced me to a simple, zero-effort method that transformed my rusty tools back to their former glory.
1. The Day My Best Friend Looked At My Rusted Shears And Laughed
It was a sunny Saturday morning when my best friend came over to help me with some garden work. As we sorted through my tools, she picked up my rusted shears and couldn’t help but chuckle. “You still haven’t fixed these?” she asked, knowing full well the number of times I’d complained about them. I sheepishly admitted that I hadn’t found an effective solution yet.
She smiled and assured me that she had a trick that would change everything. She explained that all I needed was a few household ingredients and a bit of patience. Intrigued and eager to have my shears back in working order, I was all ears as she shared her secret.
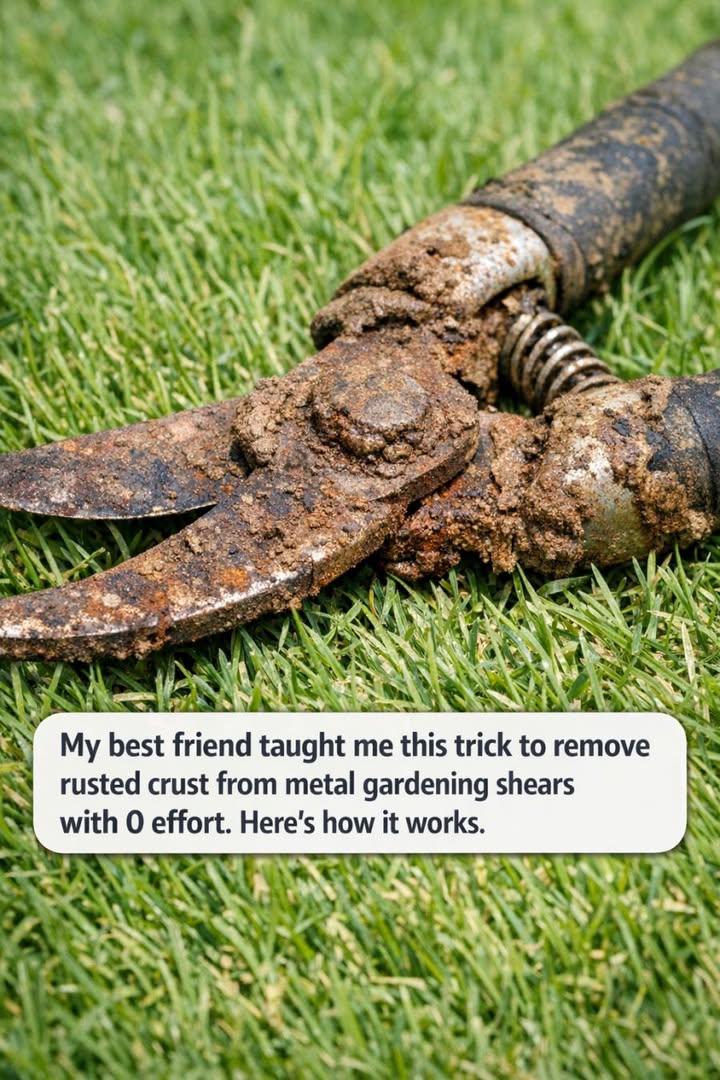
2. Why Rusted Crust Builds Up On Gardening Shears So Fast
Rusted crust builds up on gardening shears primarily due to exposure to moisture and oxygen, which leads to oxidation. When you use your shears to trim plants, moisture from the foliage, combined with the air’s natural humidity, sets the stage for rust to form.
Additionally, soil particles and plant sap can cling to the blades, creating a micro-environment that accelerates the rusting process. Without regular cleaning and maintenance, this rust quickly becomes a thick, crusty layer that can impede the shears’ functionality and even cause permanent damage if left unchecked.
3. The Zero-Effort Trick My Best Friend Swears By
The magic trick my friend revealed involves using white vinegar and baking soda—two common household items—to effortlessly lift rust from metal surfaces. She explained that vinegar’s acidity helps to break down the rust, while baking soda acts as a gentle abrasive to scrub away the remaining debris.
This method requires minimal effort because the solution does most of the work during a simple soaking process. My friend assured me that after a few hours, I wouldn’t believe my eyes when I saw how the rust simply lifts away, leaving my shears looking almost new.
4. The Simple Household Ingredients You Already Have
To execute this rust removal trick, you’ll need white vinegar, baking soda, a large plastic container or bucket, and a soft cloth or sponge for wiping down. White vinegar is a staple in most kitchens, and its acidic properties make it an excellent rust remover.
Baking soda, another pantry regular, will come in handy for a gentle scrub post-soak. With these ingredients on hand, there’s no need to purchase any specialized cleaning products, making this method both economical and convenient.
5. Step-By-Step: Setting Up The Soak So It Works While You Relax
First, take your plastic container and fill it with enough white vinegar to fully submerge your rusted shears. It’s important that the shears are completely covered to ensure all areas of rust are treated.
Next, simply place the shears in the vinegar bath and let them soak. This is the “zero-effort” part of the process, as you can now go about your day while the vinegar works its magic. Depending on the severity of the rust, you might want to let them soak for several hours or even overnight for the best results.
